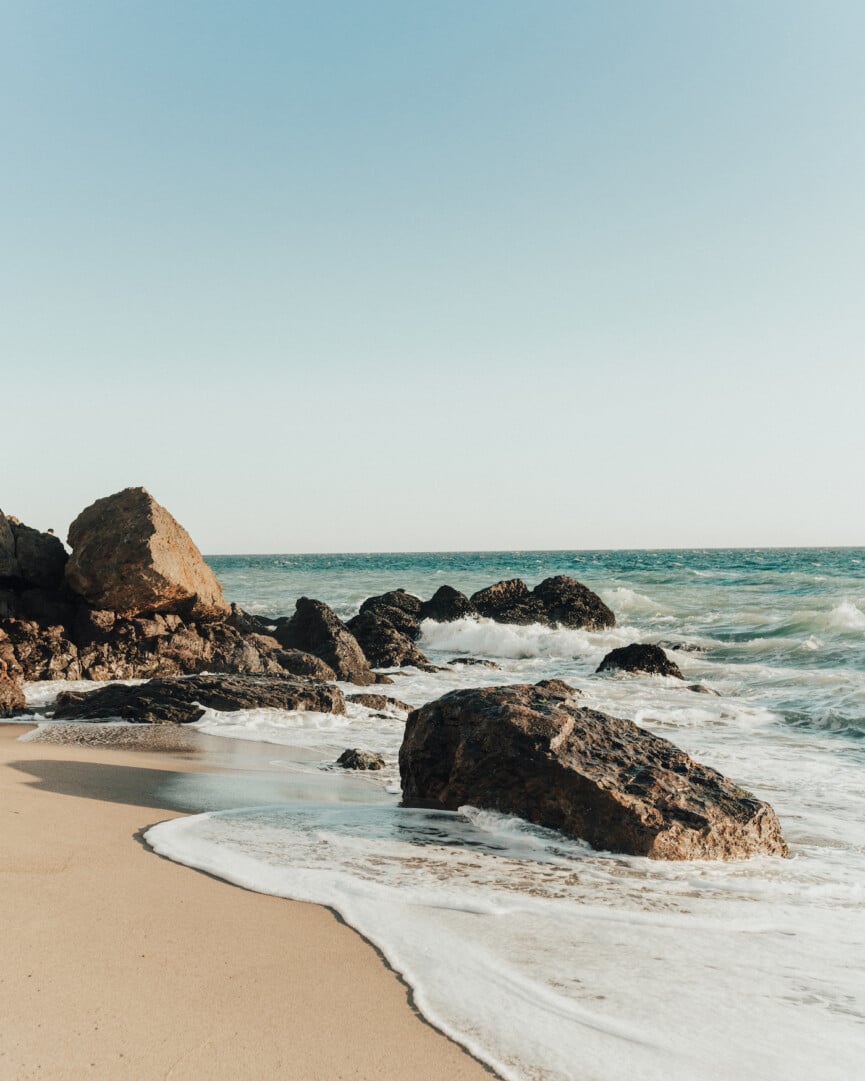
If you’ve been following along, you know that we’re deep in the process of transforming a 1950s Malibu beach bungalow into our family’s retreat (get caught up on our Renovation Diaries here!) After a years-long permitting process, we’ve finally begun construction. The silver lining is that all those delays gave us ample time to plan every possible design detail.
Today we’re diving into one of my favorite design topics: how to curate the perfect mix of materials for a home. Read on for my approach—and the materials we’re using in our Zuma Beach House renovation.
Materials really matter—here’s why
You know that feeling of sinking your feet into a super soft rug when you climb out of bed in the morning? That cocoon-like state is the exact feeling I want to evoke whenever I’m home. Textures and materials have a profound impact on how a space feels, shaping our everyday experiences and emotions.
For me, material choices are just as important as color and form. They can create a sense of warmth, serenity, or even excitement in a space.
Through materials, we can enhance our daily experiences—whether that’s the smooth coolness of stone underfoot, the warmth of wood grain, or the handcrafted irregularities of clay tile.
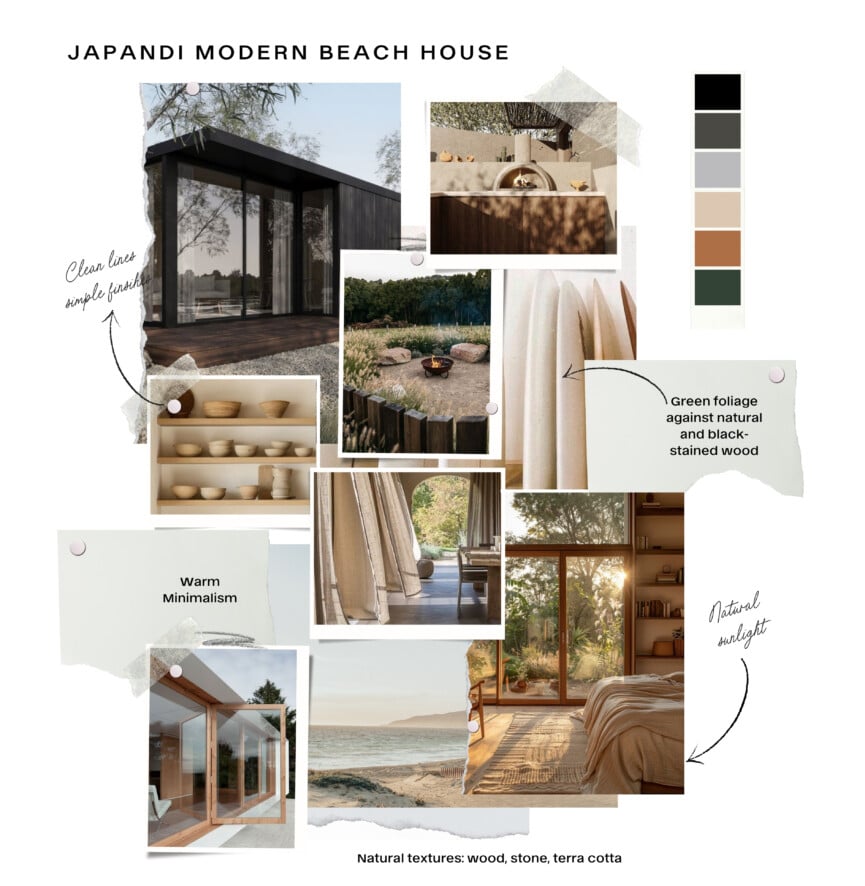
Define the Vibe
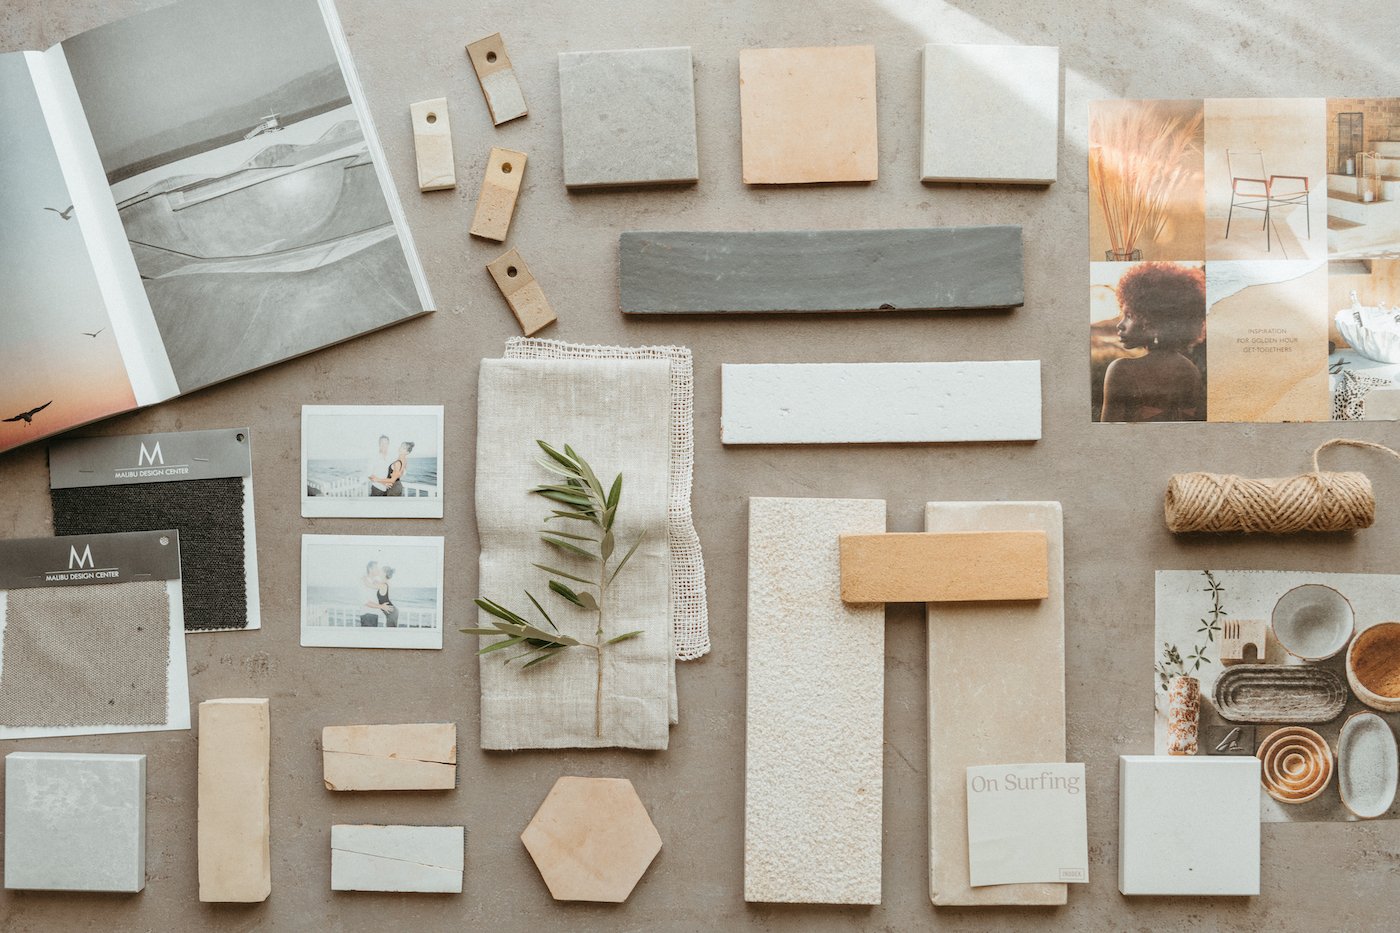
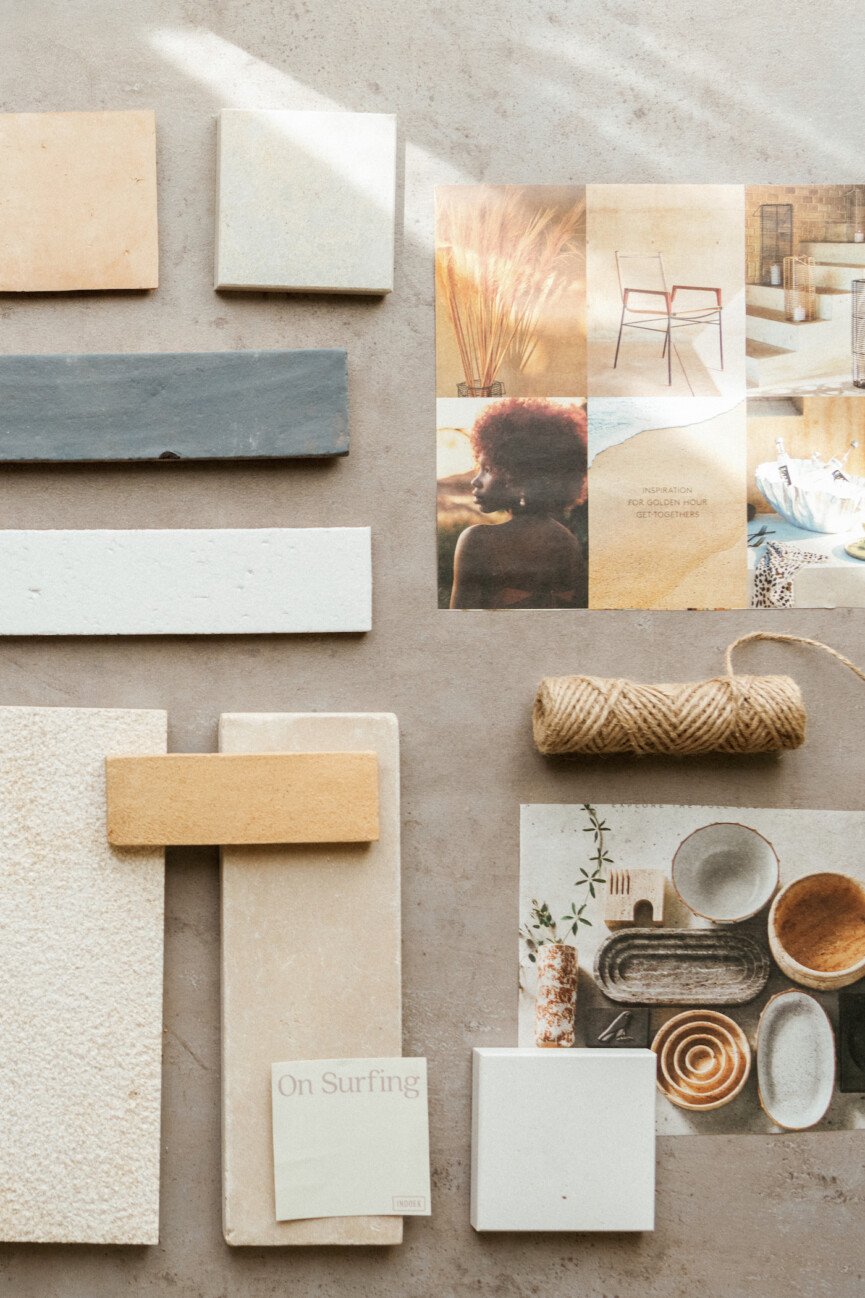
I started this process by creating a mood board that defines the materials and color palette I want to carry throughout the beach house. While some love the idea of using a different tile and paint color in every room, I crave a sense of continuity and calm. I prefer a neutral palette with consistent materials, adding depth and interest through texture—mixing hard against soft, smooth next to rough.
I’m always drawn to natural elements—stone, wood, linen, and clay. These materials bring an organic warmth that feels both grounding and timeless. As we’ve refined our selections, these elements have guided our decisions, illuminating the earthy hues that naturally come with them.
Order samples
Throughout the process, I’ve been ordering as many samples from potential vendors as possible. I’ve started laying them out, side by side, to see how each element plays against the others. Especially when working within a neutral palette, it’s these subtle textural contrasts that bring depth to a home, creating the contrast and tension that invites the eye to linger, absorb, and find unique beauty in each space.
The Materials We’re Using in Our Zuma Beach House Renovation
My goal is to let these materials shine in their natural state—keeping finishes unvarnished wherever possible to allow their raw beauty to take center stage.
For the Exterior Cladding: Redwood
Some of the most impactful design decisions are the ones you agonize over the most—because they have the power to define a home’s entire aesthetic. Choosing our exterior material was one of those moments.
While we’ve always loved stucco homes (as evidenced by our current Mediterranean-style home), the soul of this beach house is rooted in surf shack vibes. A timber-clad exterior felt like the right way to honor that essence. After much research, we landed on California redwood, sourced from Humboldt Sawmill (one of our Sunset Idea House partners.) Redwood is naturally resistant to insects and decay, making it a highly durable choice. Plus, sustainability is a core value of this renovation, and Humboldt Sawmill’s operations are certified by the Forest Stewardship Council.
I love the warm tones of redwood even more with age, so we’re working with our builders to treat the wood so that it develops that beautiful patina even faster. Stay tuned.

For the Walls: Plaster and Sheetrock
Wall finishes have been one of our biggest debates. Adam and I both love the depth and texture of plaster, but it’s a bigger investment and takes more time to apply (you can read about our journey to plaster walls in our Austin house.) The alternative—smooth sheetrock painted in a soft, semi-matte white—also captures the airy, beachy feel we’re going for.
So, we’re doing a mix: Plaster in key areas like our great room addition and primary bedroom, where we’ll embrace negative space with subtly textured, earthy walls. Sheetrock everywhere else—painted in a custom-matched hue so the transition between materials is seamless.
For our plaster finishes, we’ll be using Roman Clay by Portola—color TBD. Our sheetrock will be painted a coordinating shade of Benjamin Moore paint, which is always my go-to for its high-quality and beautiful array of colors.
For Exterior Accent Walls: El Dorado Stone
To add dimension and a sense of organic beauty to the exterior, we’re incorporating El Dorado Stone in Country Rubble on select accent walls. I’ve always loved the depth and character that this manufactured stone brings—it has the authentic, aged look of natural stone while being more lightweight and sustainable. This will tie together the natural elements of the redwood siding and give the home a rich, textural appeal.
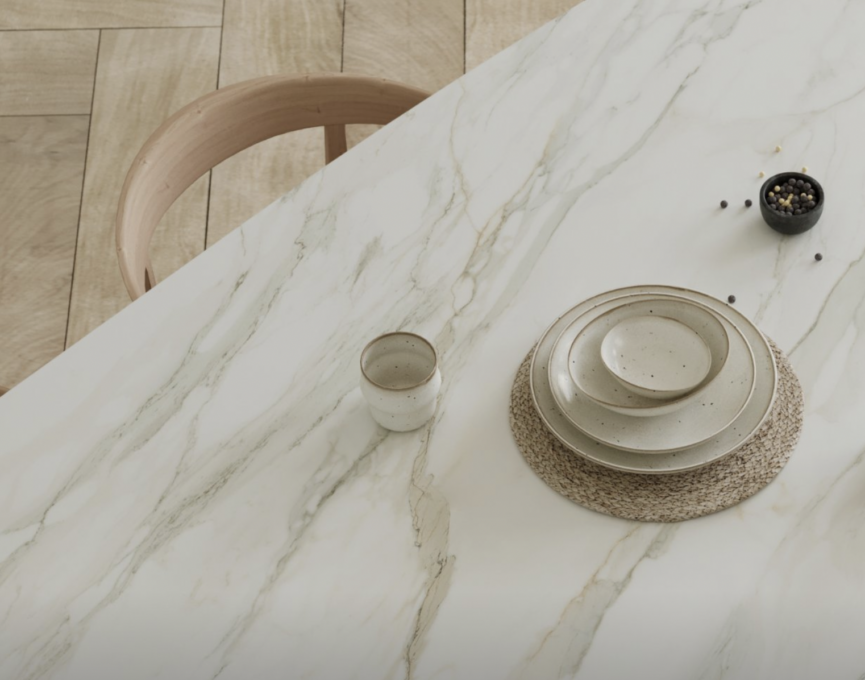
For the Countertops: Caesarstone
I’m endlessly fascinated by the various types of stone—there’s something romantic and almost mysterious about a dramatic vein running through a slab of marble, or a timeless piece of moody soapstone. But when it came to choosing a beautiful and durable stone for our countertops and backsplashes, I really didn’t consider anything besides Caesarstone, which I’ve used and loved on the last three major design projects I’ve tackled. My current kitchen countertops have stood up to massive wear and tear without so much as a scratch or a stain.
Since I’m incorporating it in both the kitchen and baths (even as slabs on the floor and walls in the primary bath!), I’m mixing a few different colors:
- Aluminous – “Concrete meets porcelain in a light, neutral surface that looks like fresh cement, porous and slightly uneven, contrasted by fine-grey grains and a soft stony appearance that add a rocklike texture.”
- Mirabel – “An ivory base mixed with washed clay in a bold and complex metamorphic structure…the opaque depth of hard marble with the soft translucency of alabaster.”
- Marenstone – “A dry neutral base infused with ivory and beige granules, like fine particles of sand and crushed shells that morphed into an ancient stone over millennia. Mottled highlights and brown scuffs evoke the rugged appearance of a humble sedimentary rock.”
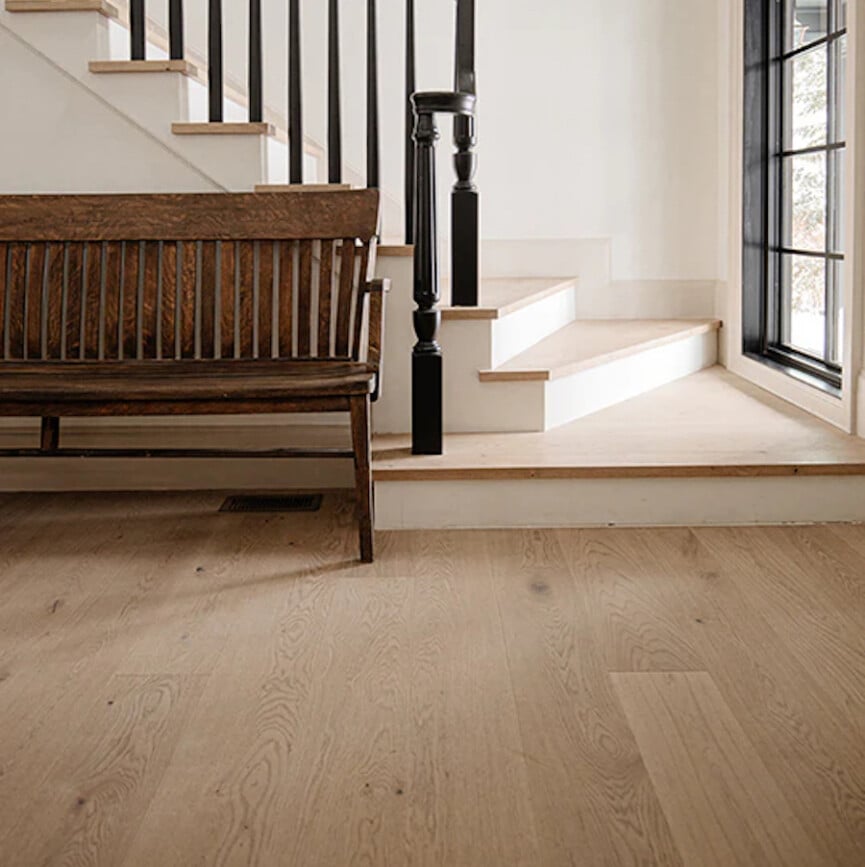
Natural Wood Floors and Cabinetry
Throughout the house, we’re using Stuga flooring in the shade “Ingrid“. Made in Europe, Stuga’s engineered hardwood floors have a stunning natural aesthetic, with wide planks that bring warmth and timelessness to the space. Their matte finish and light, neutral tones will perfectly complement our beachy, airy design aesthetic.
We’ll also be doing custom cabinetry in White Oak, which is one of our higher ticket investments on this renovation. Every design project has taught me a little more about where to save and where to invest, and for me, cabinetry is one of those areas where it’s worth it to go with a very well-built high-quality option.
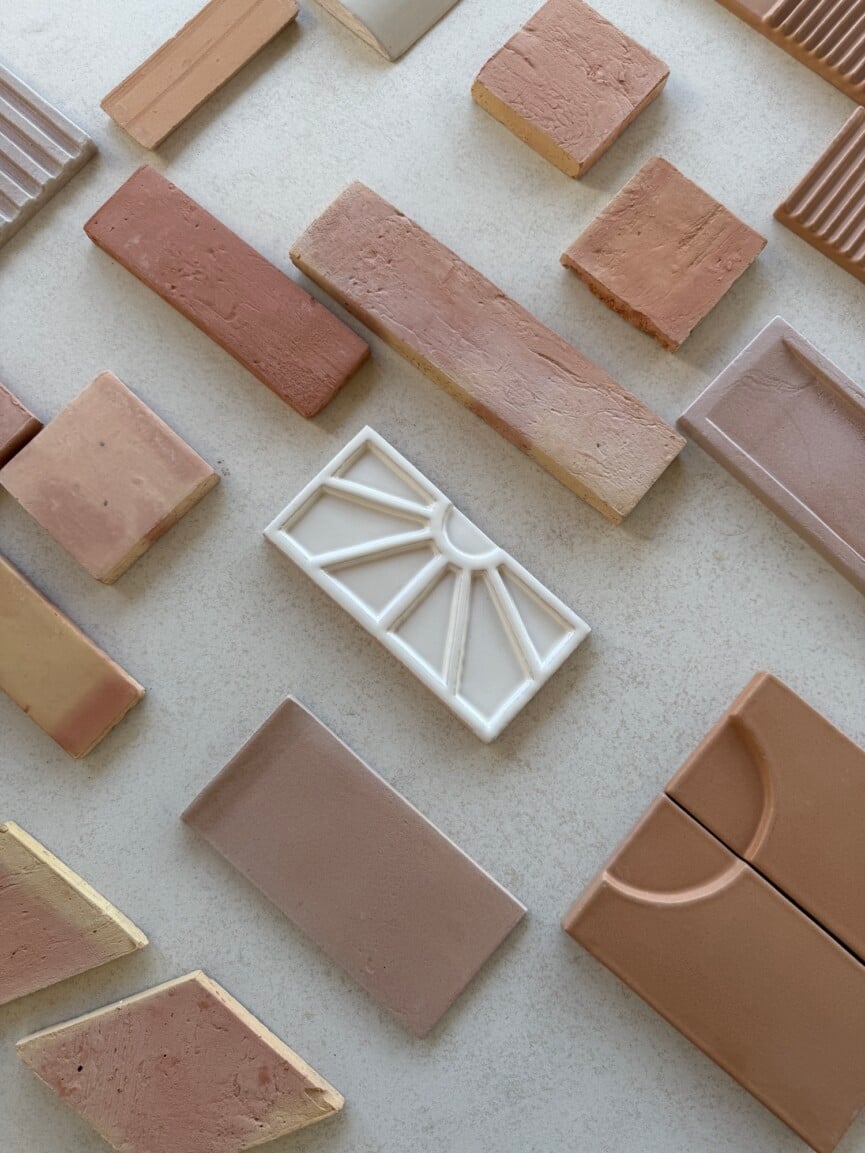
Terra Cotta Tiles
I’m obsessed with the terra cotta tiles from Clay Imports that we’re incorporating into a couple key spaces. These gorgeous tiles are handcrafted in Mexico and so special. In the outdoor kitchen, these tiles will add a warm, earthy texture that makes the space feel like a true outdoor room. We’re also considering using them in the bunk room bathroom, adding a rustic contrast that enlivens what is currently a more neutral space.
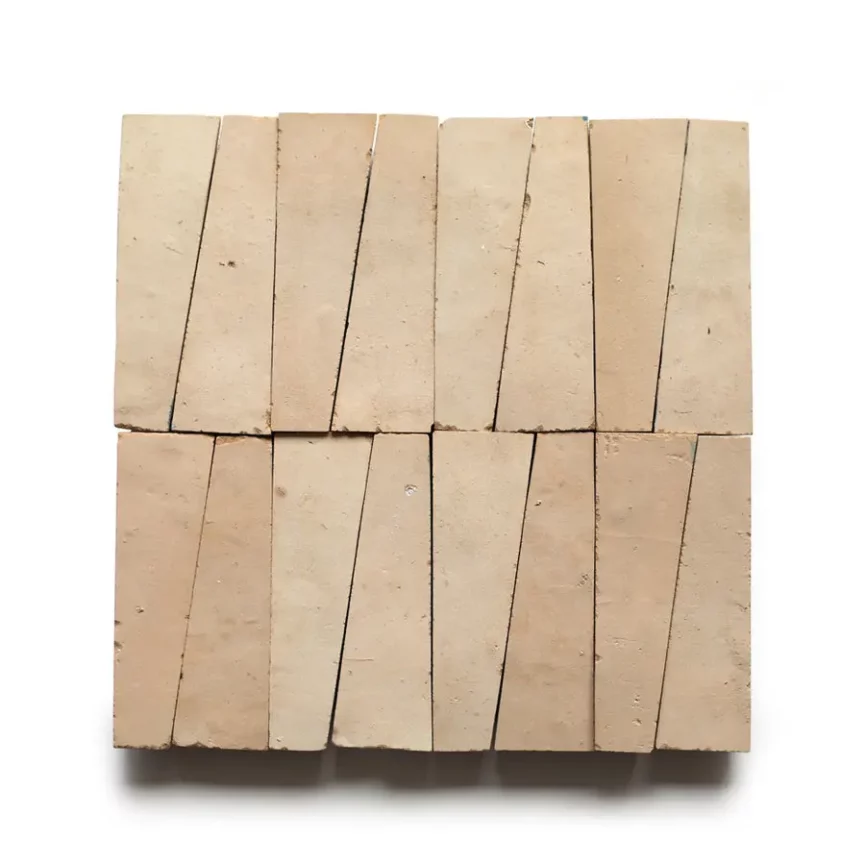
Clay Zellige Tiles
Every renovation needs an element that gives you butterflies, and for me, that’s clay zellige tiles. Unlike overly decorative tile, zellige is all about organic texture, bringing warmth and dimension to a space.
These Moroccan tiles are handcrafted using centuries-old techniques. Their sun-dried, hand-glazed surface means no two are alike—giving them a wabi-sabi imperfection that I love.
Ours are coming from Zia Tile, and I’ll be using the following selections in various bathrooms, as well as the guest house kitchen:
Even though I’m in love with this material, tile still scares me a bit! There are so many factors to consider: horizontal versus vertical, stacked versus staggered versus herringbone lay… and then there’s the grout! I’m reminding myself that, sometimes, you’ve just got to do the research and then take a leap.
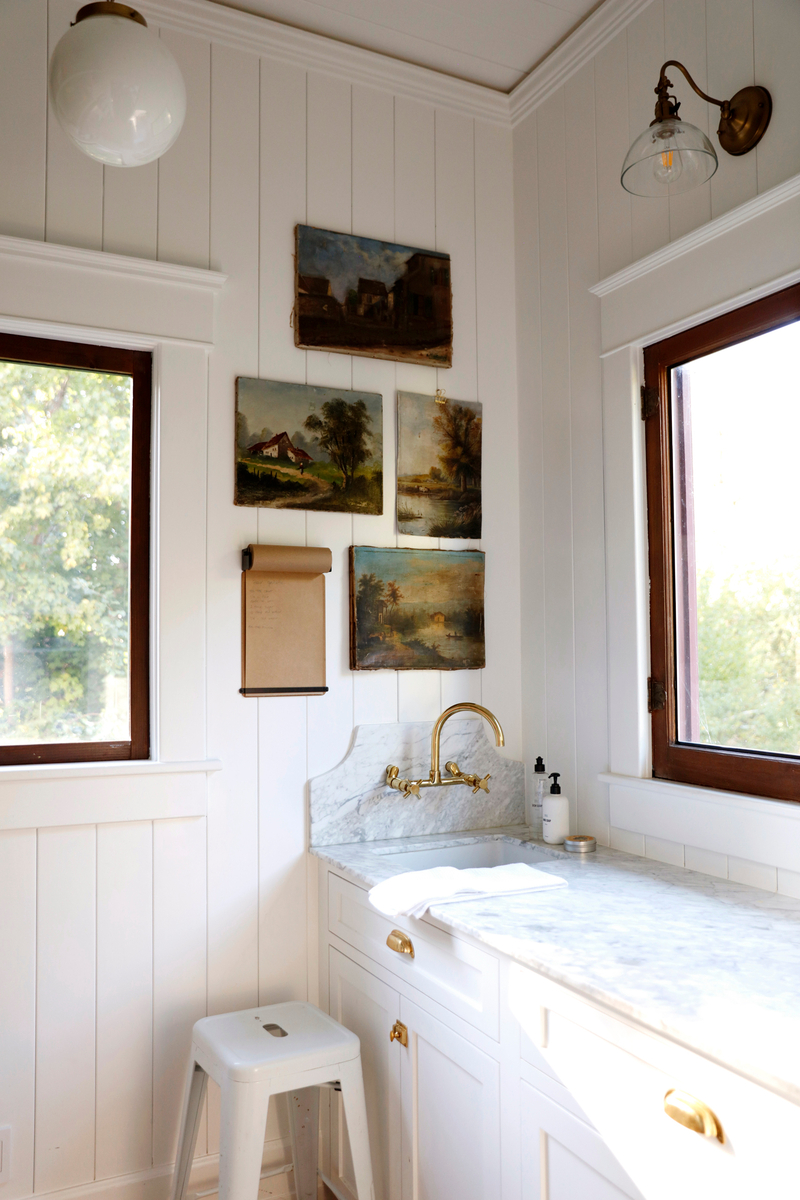
For Hardware: Unlacquered Brass
Plumbing fixtures and hardware may seem like small details, but they have a huge impact. Unlacquered brass has been on my dream list for years, and this beach house is finally the perfect place to use it. The warmth and softness that unlacquered brass brings to a kitchen or bath would feel right at home in the casual, sun-bleached palette I’m envisioning for the house.
I’ve heard many cautionary tales about using unlacquered brass (also known as a “living finish”). There’s maintenance—you have to use a special cleaner, and most experts recommend installing a water softener. You also have to embrace the patina and the age that happens over time—kind of like the decision to use marble, you have to be ready for it to look “imperfect” with use. I see charming character, whereas others might see flaws.
In my research, I’ve learned that it takes about a year for unlacquered brass to age naturally. However, if you want to speed up the aging process (like I do), you can use vinegar, salt, or a brass aging product. After looking at lots of different options, I’ve settled on Kallista’s unlacquered brass fixtures, mainly from the gorgeous One collection.
More to Come…
Designing a home from the ground up means there’s always more to decide—but that’s what makes it exciting. As we finalize additional materials, I’ll share updates here, so stay tuned for more behind-the-scenes details on our Zuma Beach House renovation.